A question came across Twitter today – how can I mass delete from a related object. A great, free little application on the Salesforce.com Appexchange – Mass Delete – helps out with this, but it only comes with standard objects. Also, with the increase of wonderful, popular appexchange apps, some are running into limits for the number installed. So what is one to do? Well, here is some javascript, and how to set up a button for your related lists so that you can mass delete in just a couple of clicks.
How Do I do this?
- First, go to the object you wish to create a list button for. If you wish to do this on accounts (or any standard object), click Setup, Customize, Accounts (or the standard object you wish to use), Buttons and Links. For a custom object, click Setup, Create, Objects and then click on the object you wish to.
- Under the Custom Buttons and Links related list, click the New button.
- Enter the following information for the button:
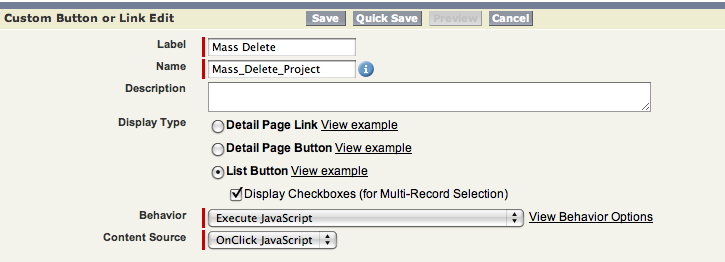
Label: Mass Delete
Name: Mass_Delete_Object (ie: Mass_Delete_Account)
Display Type: List Button, and check off “Display Checkboxes”
Behaviour: Execute Javascript
Content Source: OnClick Javascript
Mass Delete button setup - In the detail box, enter the following:
{!REQUIRESCRIPT(“/soap/ajax/15.0/connection.js”)}var records = {!GETRECORDIDS( $ObjectType.ObjectAPIName )}
if (records[0] == null) {
var errors = [];
alert(“Please select at least one record.”) } else {
var result = sforce.connection.deleteIds(records);
if (result && result.length){ var numFailed = 0; var numSucceeded = 0;
for (var i = 0; i < result.length; i++){
var res = result[i];
if (res && res.success == ‘true’){
numSucceeded++;
} else {
var es = res.getArray(“errors”);
if (es.length > 0) {
errors.push(es[0].message);
}
numFailed++;
}
}
if (numFailed > 0){ alert(“Failed: ” + numFailed + “nSucceeded: ” + numSucceeded + ” n Due to: ” + errors.join(“n”));
}
else {
alert(“Number of records deleted: ” + numSucceeded);
}
}
window.location.reload();
}
Now, the only part you need to change is the second line, where it says $ObjectType.ObjectAPIName. If you were doing this on accounts, you would use $ObjectType.Account. For a custom object, find the API Name on the top of the main object page (For a custom object called Projects, with an API Name of Projects__c, you would enter $ObjectType.Projects__c. - Click the Save button. You will know have this button available on all lists.
- The final step is to add this to all your lists. To do so, you must edit the page layout for the object you would be on to see the list. As an example, if you wanted to delete projects from an account page, you would edit the Account page layout, go to the related list, edit the Project related list, and add the Mass Delete button. Save the layout change, and you are done.


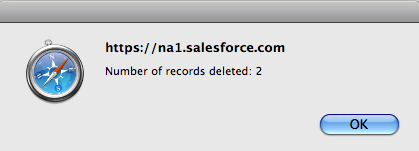
When using the button, check off the checkbox beside the record(s) you wish to delete, and click the Mass Delete button. Upon it finishing, a pop up will alert you to the number of records which has been deleted, and then refresh your page.
Hope you find this useful – and one final caviat. Please delete with care…although the records will be in your recycle bin, make sure you know what you are deleting before doing so!
Enjoy the week!
Nik
Hi! I was surfing and found your blog post… nice! I love your blog. 🙂 Cheers! Sandra. R.